Thursday, July 29, 2010

Thoughtful Thursday

One of my friends messaged me this morning with the news that her first guitar book is on its way to her, and she is SO excited about starting to teach herself guitar.  Music is another creative outlet that I love; in fact I was a musician myself for quite some time.  I spent many years as a jazz vocalist in high school and early college, and was even working toward my BA in music for several years before I went into education (I love now that I’m a teacher with a very heavy arts background… I have minors in music and visual arts).  I no longer study or perform much, and while I miss it sometimes, I get a lot of creative satisfaction from sewing, crafting, decorating, jewelry making and the other visual arts I do.How do you measure progress?
In our discussion, I found myself comparing and contrasting my experiences in music and my experiences as a seamstress and crafter.  As much as I loved making and performing music when in was in college, it was a definite struggle.  I think one of the hardest things for me was being unable to see much of a tangible result as I worked and studied to create better music.  That made it hard for me to muster up the discipline to continue (among other things…  ah, how complicated the early twenties are…).  When I found myself leaving the music school. my teacher told me that while I clearly had the talent, I lacked the discipline and desire.  I had to agree!

The visual arts are a lot more of an immediate result, and very tangible products that I can make comparisons with.  It’s interesting sometimes to look back through my costumes and see how I’ve changed and grown, and look at the visual reminders of an old skill that I’ve improved, or a new one I learned.  Crafting and sewing are also things that can be repaired, for the most part; the artist can come in and make changes after the fact.  Once a wrong note comes out of your face, it’s out there!  Whoops!

As an educator, I see my very obvious kinesthetic learning style revealing itself in these experiences, and I think that’s one of the things that makes me a strong crafter.  I get a deeper understanding of something I’m learning if I’m doing it with my own hands (and brain, and eyes, etc).  I naturally feel confident about that, so I see where I’m drawn to activities and problems that I can solve in a hands-on way.  I’m a big proponent of hands-on teaching and problem solving for this reason as well.

I’m really glad that I’ve been lucky enough in my life to experience as much of the arts as I have; I think it makes me appreciate the work that goes into music and arts that much more.  What do your experiences tell you about your work, and yourself?

Tuesday, July 27, 2010

Dressing Ophelia – Part 1

I’m so excited about this project!  Ophelia is my absolute favorite John Williams Waterhouse painting, and one of my just plain old favorite paintings. I’m a big fan of the Pre-Raphaelite painters in general; I love the source material of classic legends, fairytales, and myths, and the deliriously beautiful figures and ladies.  I think this was fantasy art before fantasy art existed.

I’m going at this in a very specific manner.  I wanted really to work in ‘period’ fabrics, but as Pre-Raphaelite costume design has little-to-no real historical basis, I’ve let that one slide a little.  I was very interested in going with a dupioni silk (a rough woven, slubbed silk) in a pale gold and blue crossweave, but the color and style I wanted was very expensive.  I was willing to pay for it, until I came across a wonderful synthetic dupioni at a wholesale clearance at Wesco Fabrics.  It was only $3 a yard, had the crossweave colors I opheliawanted, and was actually a little better that the dupioni I’d been considering – less shiny! - so I couldn’t pass that up!

The second fabric I went hunting for was the gold for the trim throughout the dress.  This was difficult, too, as I wanted a color well suited to the blue-gold dress fabric, needed something lighter that would be appropriate for appliqué, but wasn’t a shiny plastic metallic.  Here too I checked out a few more expensive silks, but finally came across this synthetic charmeuse in a warm, rich gold that went perfectly with the dress fabric.  It has a bit of a metallic sheen without being SHINY.

So I’m great for materials at this point!  I’ve ordered gemstone chips for the beadwork on the cuffs and hem; I still need seed pearls for the sleeves.  I’ve also completed my alterations to the pattern… here’s how that went!

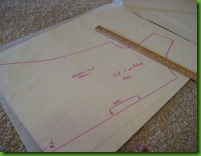
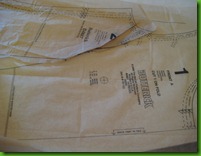
This medieval style of dress would typically be known as a cotehardie, a closely fitted garment with sleeves.  There are LOTS of patterns for this style of dress, commercial patterns included.  I started with one – the Butterick 4827 – that has a good look, the fitted bodice and sleeves and flared skirt I’m looking for.  It also had the style of neckline I was looking for; while it’s possible to alter for that, it’s of course easiest to start closer to your final product. IMG_2364IMG_2362

However, one thing about the pattern I didn’t like… the super princess seams.  These are clearly absent from the painting (alas, there is a lack of seam lines at all, but I digress), and as princess seams are considered a more modern application, I wanted to avoid it.  For me, the simple answer was to draft them out!  I did this by carefully folding and laying out the pattern pieces until the seam was matched up,IMG_2366 much like one would while sewing them together.  Then I traced over the combined pattern pieces using tracing paper to create an entirely new pattern piece.  I did leave the princess seams in the back; while it’s only partially period, it’s also serving to keep that fitted appearance that I wanted while still being somewhat hidden in the back.  The curve of the side seams were deepened to accommodate for the fitting that was drafted out by removing the princess seams.

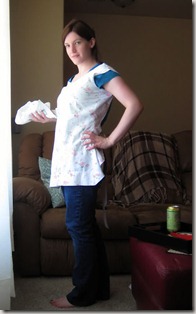
As you saw from yesterday, I did some additional fitting using some scrap that later got turned into a cute apron!  I wrapped the waist with a spare piece of fabric to check how the fit would appear with the belt on; it serves a great purpose of helping to cinch in the waistline for a better fit, as well!  I’ll also be adding a wider flare to the skirt at the hips to get that extra, dramatic fullness!

Next time: Dun dun dun!  Finding and creating the lion rampant appliqué.  Whew!  Lots of cutting.

I’m also thinking Tuesday posts will be costuming oriented… I do love a theme!

Monday, July 26, 2010

You never know when you might need it…

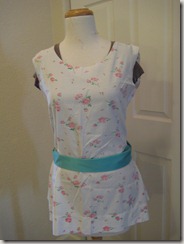
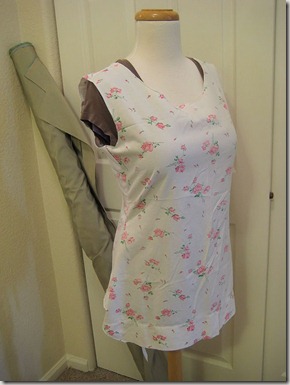
apron01I’ve been working on my Ophelia dress the past week or so (I will share more about this Tuesday!), and as I was working through my pattern alterations I had my sort of shell of the scrap I used for fitting the pattern pieces left, and as I kept staring at it I thought… that really should be an apron.

I did not previously own an apron, but I can think of at least a dozen instances where having one might have spared a shirt or two from a stain.  I also know of a second grade teacher in my district who wears one (very similar to server-style aprons) daily, filled with typical classroom needs: pencils, markers, crayons, sticky notes, band-aids, hand sanitizer, etc!  Really great at meeting those everyday needs.

So, my post-fitting scraps were hanging out on my dressform (affectionately named Sophie), so I pulled it down and trimmed away the excess fabric.  Since I knew it would need to be tied in the back, I basically eliminated the back portion entirely, easing into the top so the shoulders would still be there.  Once I had a good free shape, I serged around the entire thing, arm holes included, and stitched on some grosgrain ribbon at the waistline on each side of the back opening.  And there you are!  Nothing fancy, and no lace as of yet, but I think a few pockets might be a good addition!

apron02

What have you unexpectedly created while working on another project?

Tags: , ,

Saturday, July 24, 2010

A Dress a Day!

image

I love everything – I mean EVERYTHING – about this blog.  New Dress A Day does literally what it says.  The author (who’s name is appropriately mysterious) takes a $1 secondhand piece and recreates it into a functioning piece of current clothing.  Much like Julie & Julia, only with more Goodwill and less wine (well, there might be alcohol still involved, I wouldn’t begrudge anyone that).

Her projects turn out excellent and flattering, and I’m totally blown away with some of the absolutely terrifying pieces she starts with (satin 80s bridesmaid dresses, anyone?  No, I didn’t think so).

Amazing, amazing, amazing, and super-duper inspiring.  I will keep this in mind next time I’m clothes shopping!  There are no more excuses for not buying stuff I like that doesn’t fit!

Tags: ,

Thursday, July 22, 2010

What did you do for the holiday?

This is a little belated, but the Boy and I made a great wall feature over the 4th weekend.  It was the first project of it’s kind we’d taken on, and with new Ryobi circular saw in hand, we embarked upon a great adventure!

image

The Bamboo Flower Box Wall Art Feature!  Now with lights!

It is admittedly not a new idea; I pulled it from a show on HGTV, but the construction and application were all us.  The main component was the bamboo, which I happened to find a HUGE deal of at the Arc a few weeks beforehand, on a SUPER DUPER SALE. These reeds can be found typically at your localimage crafting/decor store.  We needed to make a long, thin box to hold the bamboo with, and since there was nothing available in the size we wanted, we decided to make it ourselves! Our trip to Home Depot brought us to the 'remnants' section of lumber, where we purchased four pieces of lumber for... $0.50 each! So just $2 for our lumber! Also, the reeds were on sale for $1 a package (we used about three… I still have three more left! 
 
Before we went shopping for our box-making supplies, we made some cursory sketches based on our measurements of the wall and the area where we wanted the feature to be (it’s next to our dining table).  We wanted it to be about 3 feet (the height of the reeds) by 4 feet, but very shallow, as to not take away space from the room.  And it IS intended to be a wall feature, of course.

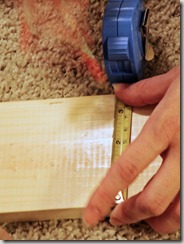
We made the box with pine and poplar, and we discovered that poplar does not take well to screws, and tends to split.  In the future we’ll stick with pine! Construction was done with #6 1.25 inch wood screws and wood glue. The finished dimensions of the box are 3x3.5x48, open at the top.

imageWe also picked up the Ryobi set of cordless drill and circular saw, which was invaluable. I was going to ask for one for Christmas... XD But Boy decided we might as well have it now! It came in VERY handy indeed!  As you can see, we worked outside on our patio (we live in a townhome and have no backyard!) on my bulky fold up table, and we had a lot of success.  I was definitely concerned about our lack of outside space, but our small front yard and patio worked fine (pardon my dead plants ;_; Gardening is not yet a skill I have).

We painted with Krylon dark brown spray paint to contrast the blonde bamboo and coordinate a little more with the dining furniture. Just about two coats did it! A 1.5" hole was drilled in the bottom for the string of lights.  We put about an inch and a half of floral foam in the bottom to help stabilize the bamboo, and then set them in place. It was finished off with a layer of river pebbles from Hobby Lobby (about one and a half bags at $3 each). 
image
Et voila! Also it glows in the dark! XD We need to tack down the rope light a little, but otherwise not bad. So how did your holiday weekend projects go?


Tuesday, July 20, 2010

Lofty goals…

pillow03


pillow01

I’ve been struggling to find any and all neutral and aqua pillows to add a splash of lighter, brighter color to our beige and red-highlighted living room.  The Boy indicated one day that aqua was a color he liked, so I thought, why not?  Pillows aren’t a big commitment in any case, so I’ll try it out.pillow04

Alas, pillows brand new are prohibitively expensive!  Even when I started plotting to make my own, I was disappointed at the prices of pillow inserts!  Goodness, $20 for a 20 inch pillow?  That wasn’t going to fit within my nonexistent budget.  So what else to do but turn to my local secondhand shops?  On a trip with friends, I picked up several secondhand pillows – after confirming of course that they had separate inserts that could be removed.  I paid between $3-4 per pillow.  With two sets each of 20 inch and 18 inch, as well as an extra large floor pillow, I went in search of fabric.

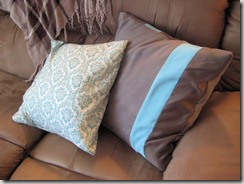
I had some more neutral browns and soft grays in my collection, so I picked up remnants in the aqua color I was looking for.  Remnants are typically marked down at least once, and were on sale another half off their sticker price, so I saved a lot!  I’ve finished two so far, and have a few more to go!

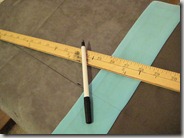
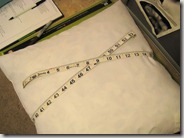
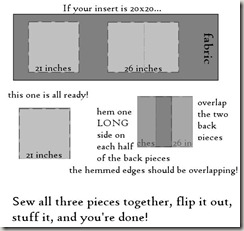
pillowdiagram Want to try it?  It’s a piece of cake!  Get your fabric and sewing supplies, and here we go!  Measure your inserts from seam to seam, both ways.  Add an inch to each of those measurements for your seam allowance (that provides about a half inch for a seam allowance on each side).  Cut one side – presumably the front side – using those measurements.  Now hang on!  The opposite side – presumably the back side – can be cut differently, so we avoid any awkward seams.  For the reverse side, add about 6 inches to your original measurement for ONE direction.  Assuming your pillows are square, you’ll then have one square, and one rectangle.  Cut that rectangle in half.  Hem one long edge of each half of the ‘back’ pieces.

Now, on to the sewing!  Line up your pieces with all your right sides together.  The two back pieces should overlap each other a few inches in the middle.  This will be the pillow closure, but with the overlap, you don’t need any connections or hardware, leaving the pillow smooth and comfy.  Sew at a half inch from the edge, trip, and turn it out to the right side.  Fill it with your insert, fluff it up, and you’re done! 

I added a stripe to my second pillow there just by sewing in a contrasting color strip and then proceeding with the directions as regular.  The color – and the support – is a great addition to the room!  What’s your favorite fast and frugal room update?

Monday, July 19, 2010

Patterns on Sale!

image

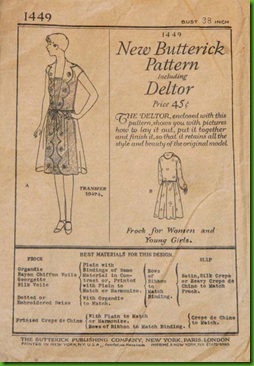
Butterick patterns are on sale this week at your local Joanns at $.99 each, so pick up a few!

Simplicity patterns will also be on sale July 29-31 for $1.99!

Saturday, July 17, 2010

A tomato a day…?

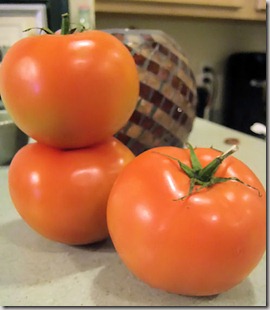
One of my favorite regular deliveries came yesterday afternoon!  These pretty organic tomatoes!  We get a little box twice a month from a local delivery service… and while I call it ‘little’ (they call it the bitty box!), it’s quite a collection of fruits and veggies.  It’s all organic, and what they can provide locally they do!

doortodoorWe get our order from Door to Door Organics!  Our location is in Colorado, of course, but they have locations in Kansas City, Chicago, Michigan, and along the East Coast.  We like this because not only do we KNOW we have fresh fruit and veggies coming for a visit on a regular basis, it’s also a REALLY great price.  Let me show you…

Our ‘bitty’ box costs us $22.66, including delivery.  This time it contained those three tomatoes, two grapefruit, a 2lb bag of red seedless grapes, 4 plums, 4 peaches, a pound of yellow squash, a 6oz package of blueberries, and 4 bananas (and let me tell you, once you’ve had an organic banana, you’ll never go back!).  Comparatively, at our local grocery store, we’ll run about $26-30 for all that (and that’s just buying regular stuff.. NOT organic!), and WE have to do all the shopping, hauling, picking… all the hard work!  With Door to Door, we just sit there and poof!  Fresh fruits and veggies!

Everything is adjustable (we actually get a bitty fruit box, but we like to trade out our not-so-favorite fruits for our favorite veggies sometimes), from the size of the box to the delivery frequency, to the contents of each individual box.  Just log into the website to make any changes, add things you might want, substitute, even add eco-friendly cleaning materials, treats like chocolate, and organic beverages!  The website is SUPER user friendly, and customer service is very helpful, if you ever need them!

We love it!  Eating right and saving money in an eco-friendly way is right up our alley.  How about you? 

Friday, July 16, 2010

Where to begin?

I got excited recently after finishing a great commission for a friend!  I'm really enthused by the construction and how it all turned out. It was a nice change to do something pretty well set by the pattern, and a good refresher of basic skills. I feel like my last few projects were SO outside the box that I got too far away from just simple, straightforward sewing.

I'm starting on Ophelia soon, I hope, for myself and letting it be a long project, if it has to be. But Sailormoon and Vanille are on the table for NDK for sure. I painted and sealed the beads for Vanille weekend before last.

It's also my goal to start planning to hit Costume Con in the next few years. I’ve never been to New Jersey!  Anyone going?

Costumes ahoy!

This is sadly late, as it's from March, but I finally got my Harold costume up!


It is shiny and has hot pink hair. ^^

I've also added a few new projects: Vanille, for NDK 2010, and Gran Mamare from Ponyo for sometime in 2011. =D  All the updates can be seen at charmedseed cosplay.

See you in a few months at NDK!

Cute hat ahoy!

I got this in my email today!

Protect your gorgeous face and precious skin from the sun this Summer with our fabulously flattering sunhat! This is designed for fabrics with a little body, like denim, canvas or home-dec materials, but you can also use lighter weight fabrics with a canvas interlining. Chic bucket-style hat has an oval crown, high tapered sides and a shaped brim with a center back, baseball-cap style cut-out. Contrast binding finishes the brim edge and a contrast band and tie means you can adjust the hat to fit you perfectly.


Get it at fabric.com!

Wednesday, July 14, 2010

Welcome!

...to Charmedseed's Blogger blog (blogblogbloggityblog)! We're getting all over the internet now: Livejournal, our own hosted Wordpress at charmedseed.net, and of course here! Choose your favorite and chat with us!